Author: chakirtazrot@gmail.com

  • Avocado Toast (6 Easy Recipes You’ll Want to Make Every Day)

    Avocado Toast (6 Easy Recipes You’ll Want to Make Every Day)

    Few dishes have become as iconic in modern kitchens as avocado toast. Simple, healthy, and endlessly customizable, this humble combination of toasted bread and creamy avocado has become a staple breakfast and brunch favorite across the United States. Whether you’re rushing out the door in the morning or enjoying a slow weekend brunch, avocado toast offers a delicious balance of nutrition and flavor.

    The beauty of avocado toast recipes is their versatility. With just a handful of ingredients, you can create anything from a basic classic version to gourmet variations topped with eggs, smoked salmon, or fresh vegetables. Packed with healthy fats, fiber, and essential nutrients, avocado toast is a satisfying meal that keeps you energized throughout the day.

    In this guide, you’ll learn how to make the best avocado toast along with six easy avocado toast recipes that are perfect for breakfast, lunch, or even a light dinner.

    Why You’ll Love These Avocado Toast Recipes

    There’s a reason why avocado toast continues to trend in cafes and home kitchens alike. It’s incredibly easy to prepare and offers endless possibilities for customization.

    Here are some reasons why these easy avocado toast recipes are so popular:

    • Quick to make – ready in under 10 minutes

    • Healthy and nutritious – packed with heart-healthy fats

    • Budget-friendly – uses simple pantry ingredients

    • Versatile – perfect for breakfast, lunch, or snacks

    • Customizable – endless topping possibilities

    Avocado toast is also a fantastic option if you’re looking for a balanced meal that includes healthy fats, fiber, and carbohydrates.

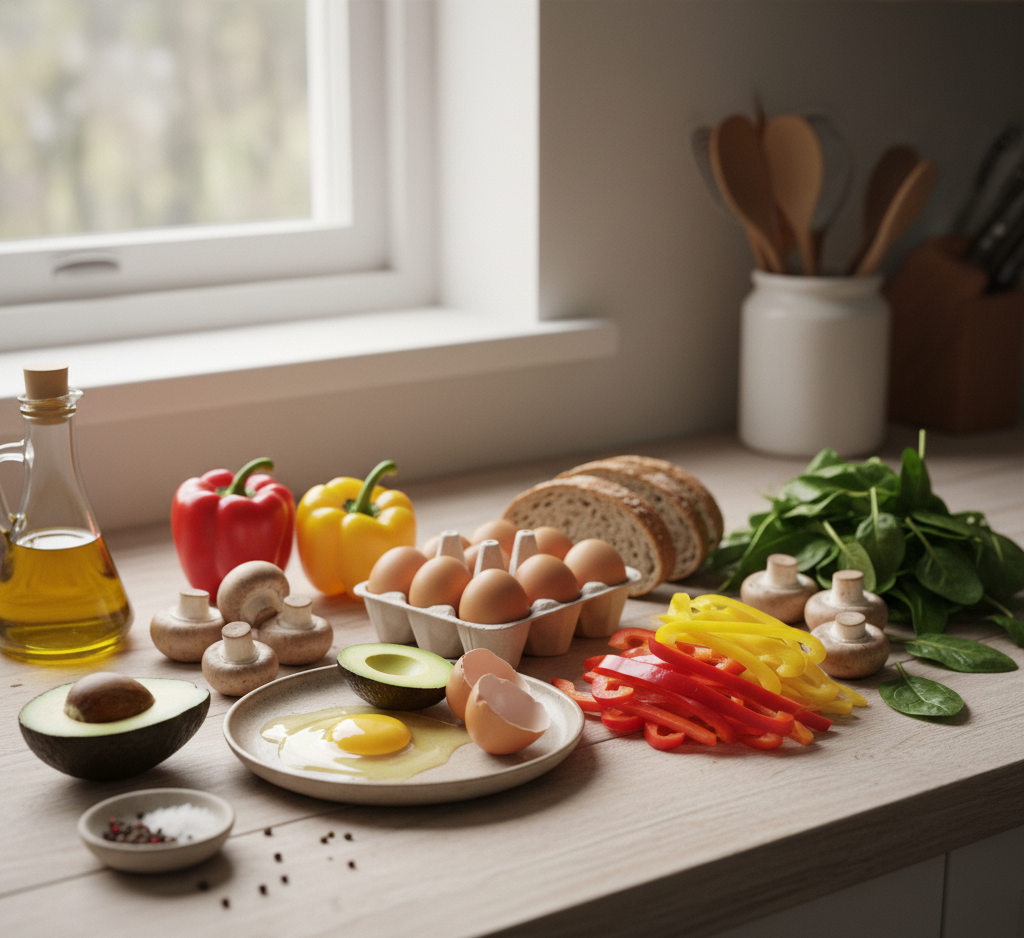
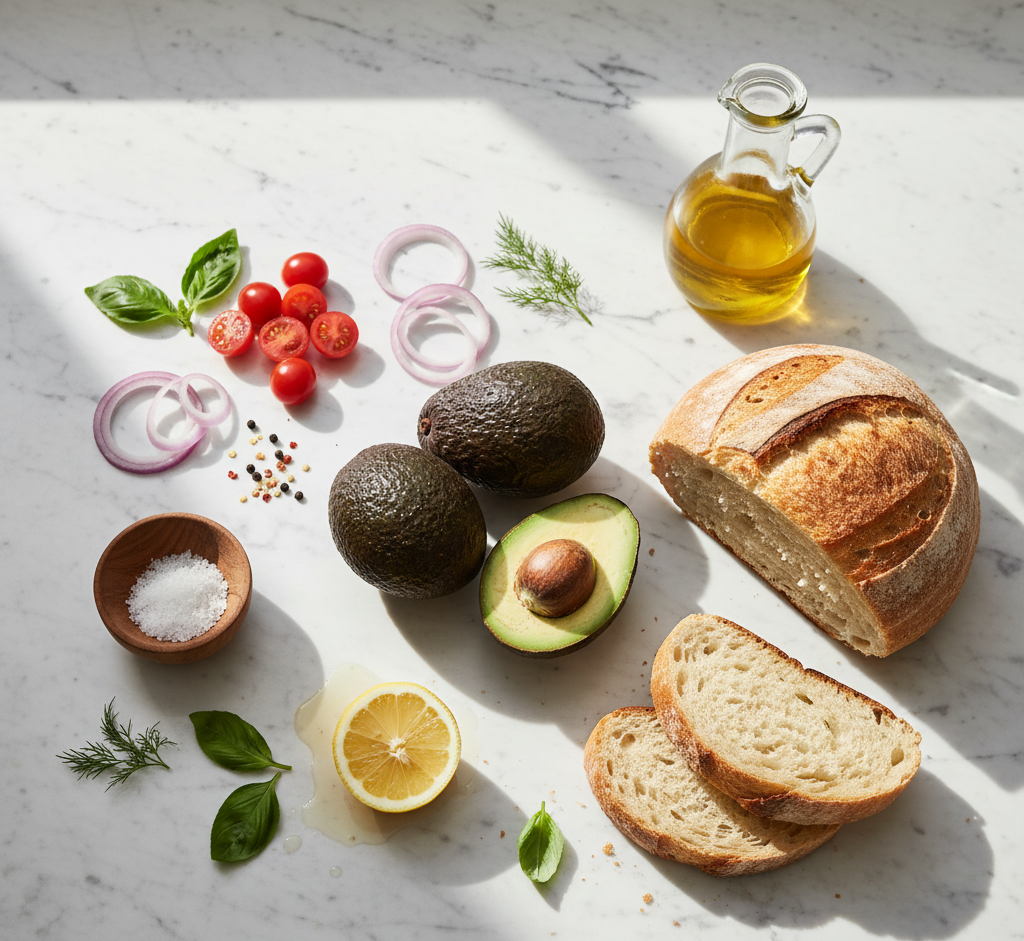
    Ingredients for the Perfect Avocado Toast

    The best avocado toast recipe starts with just a few high-quality ingredients.

    Basic Ingredients:

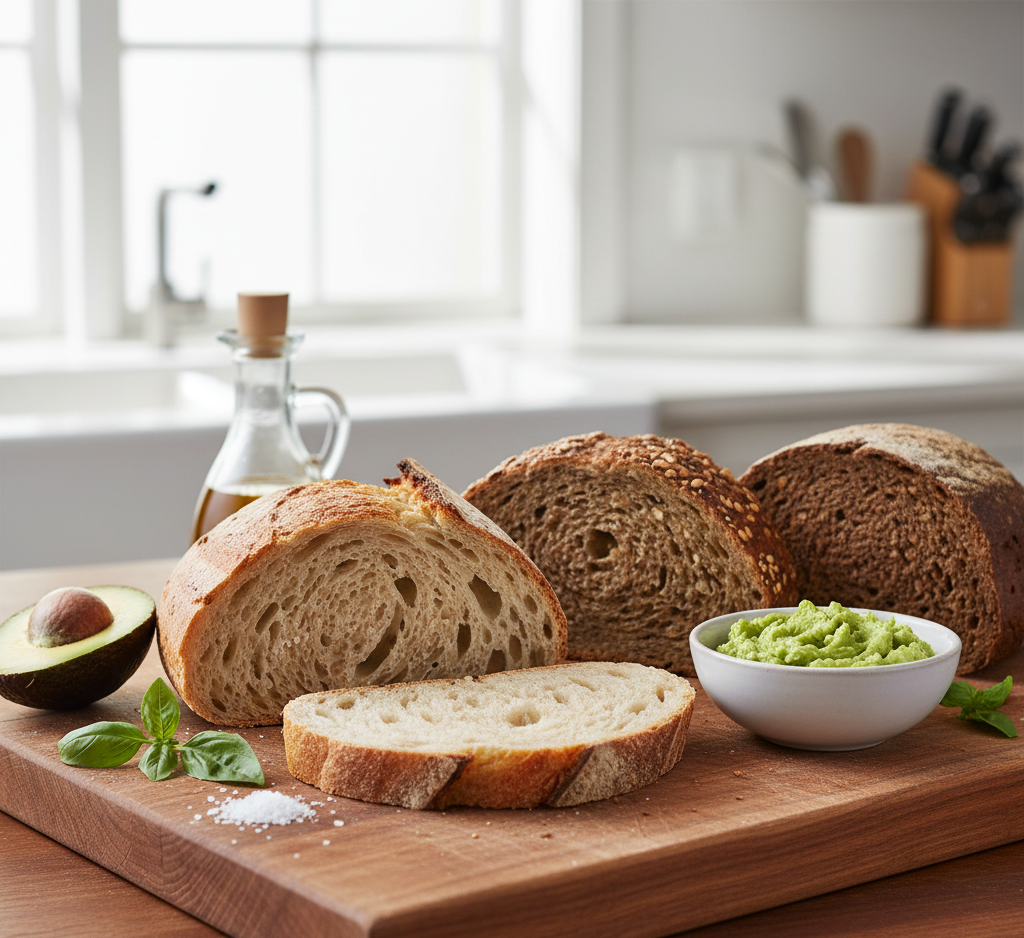
    • 2 slices of bread (sourdough, whole grain, or multigrain)

    • 1 ripe avocado

    • 1 teaspoon lemon juice

    • Salt to taste

    • Freshly ground black pepper

    • 1 teaspoon olive oil (optional)

    Optional toppings:

    • Red pepper flakes

    • Cherry tomatoes

    • Everything bagel seasoning

    • Fresh herbs (parsley, cilantro, basil)

    Choosing good ingredients makes a big difference in flavor and texture.

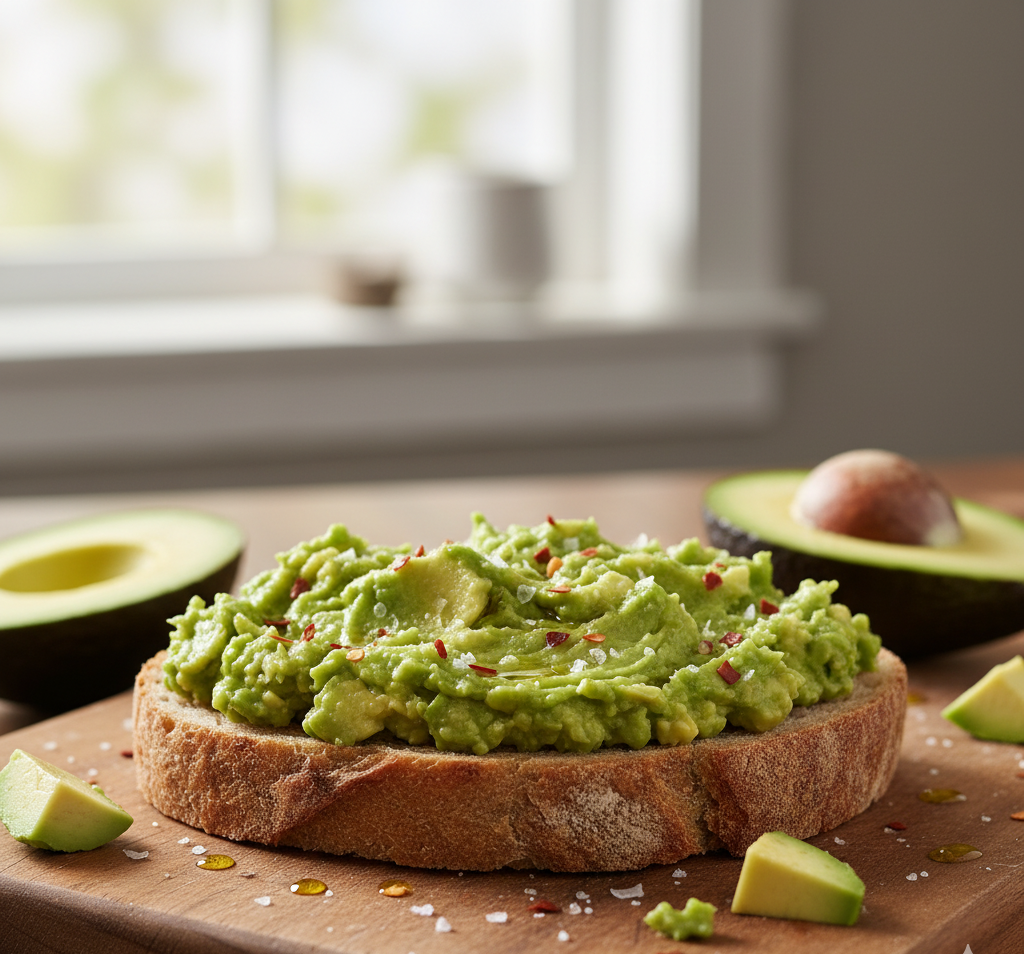
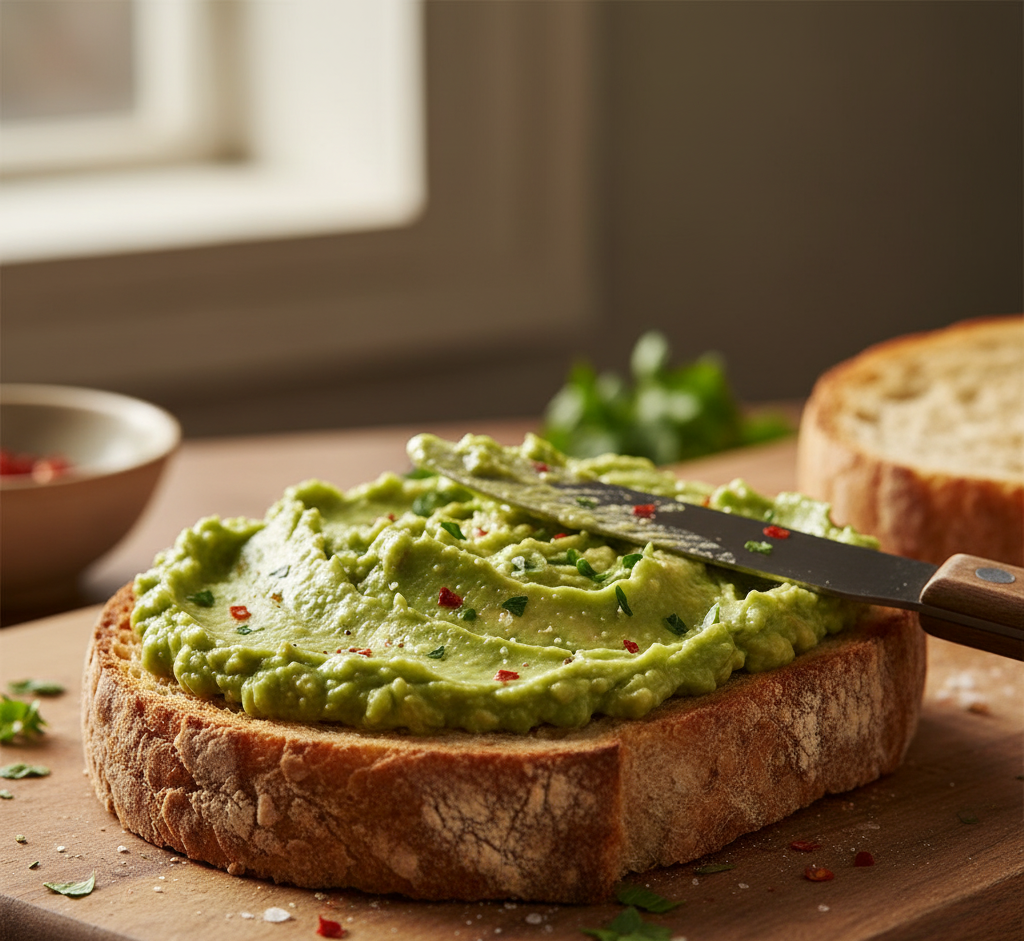
    How to Make Classic Avocado Toast

    Making classic avocado toast takes just a few simple steps.

    Step 1: Toast the Bread

    Start by toasting your bread until it becomes golden brown and crisp. A sturdy bread like sourdough works especially well because it supports the creamy avocado.

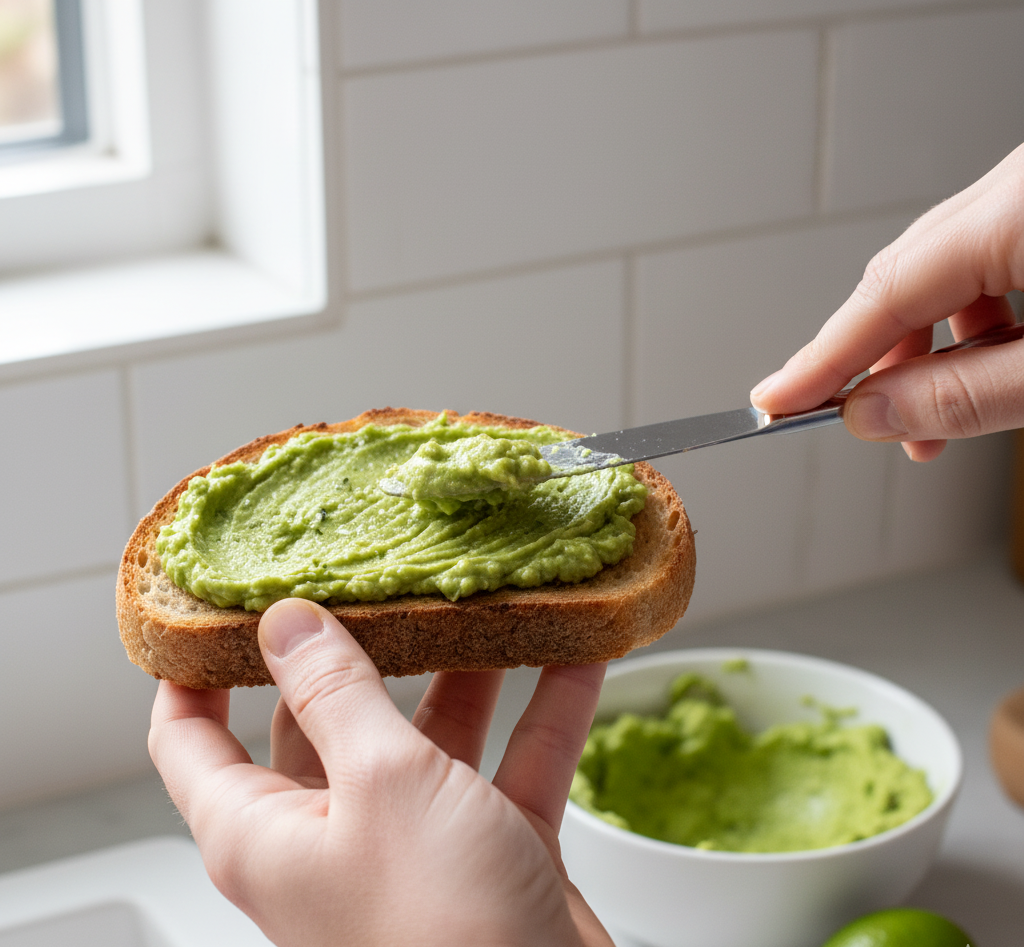
    Step 2: Mash the Avocado

    In a small bowl, mash the ripe avocado with lemon juice, salt, and black pepper. You can keep it chunky or smooth depending on your preference.

    Step 3: Assemble the Toast

    Spread the avocado mixture evenly over the toasted bread. Drizzle with olive oil and add any desired toppings.

    Step 4: Serve Immediately

    Avocado toast tastes best when served fresh while the bread is still warm and crispy.

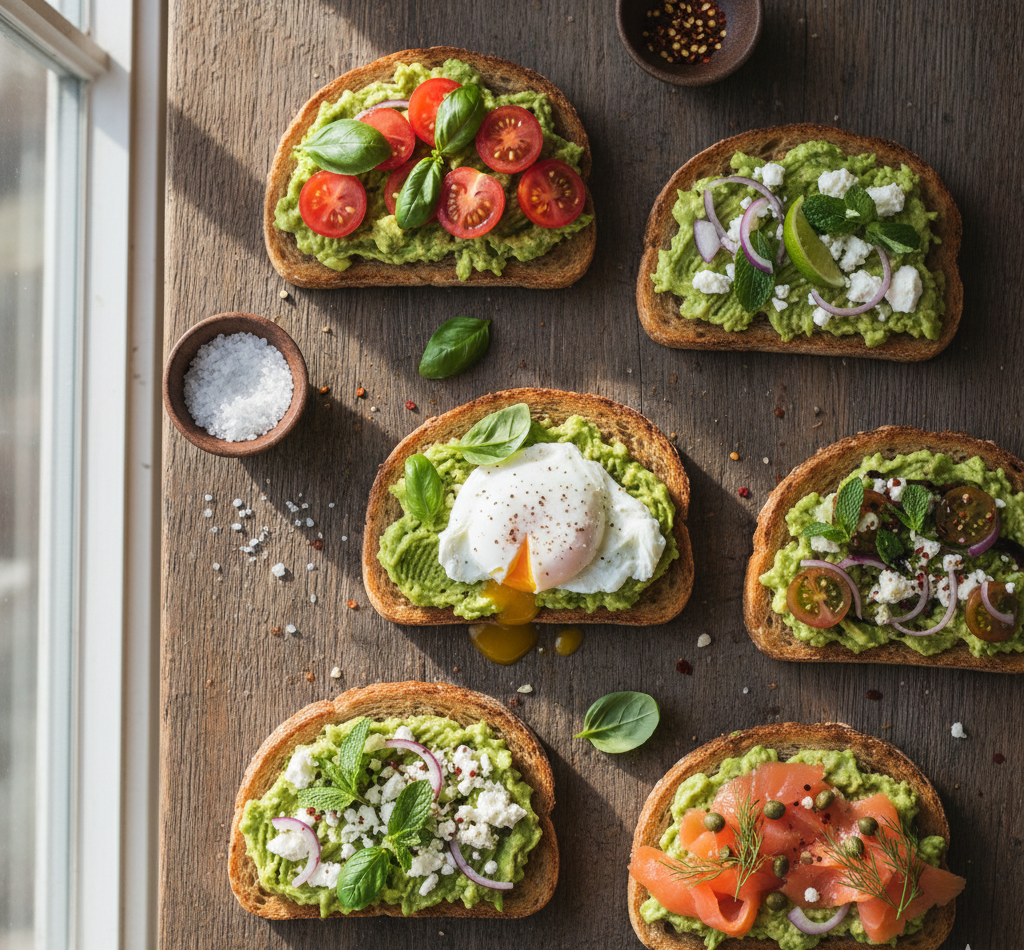
    6 Easy Avocado Toast Recipes

    Once you master the classic version, you can explore these six avocado toast variations that elevate the dish with new flavors.

    1. Avocado Toast with Egg

    Top your toast with a fried, poached, or soft-boiled egg for extra protein. The runny yolk blends beautifully with the creamy avocado.

    2. Mediterranean Avocado Toast

    Add cherry tomatoes, crumbled feta cheese, olives, and a sprinkle of oregano for a Mediterranean-inspired version.

    3. Spicy Avocado Toast

    Add sliced jalapeños, chili flakes, and a drizzle of hot sauce for a spicy kick.

    4. Avocado Salmon Toast

    Top with smoked salmon, capers, and red onion for a brunch-worthy meal.

    5. Caprese Avocado Toast

    Layer fresh mozzarella, tomatoes, and basil with a drizzle of balsamic glaze.

    6. Veggie Loaded Avocado Toast

    Add sliced cucumber, shredded carrots, radishes, and microgreens for a vibrant vegetable-packed version.

    I

    Tips for the Best Avocado Toast

    To make truly perfect avocado toast, keep these helpful tips in mind:

    • Use ripe avocados that yield slightly when pressed

    • Choose quality bread with a sturdy texture

    • Season generously with salt and lemon juice

    • Add texture with crunchy toppings like seeds or nuts

    • Serve immediately to keep the toast crisp

    A small squeeze of lemon also prevents the avocado from browning too quickly.

    Best Bread for Avocado Toast

    The type of bread you choose can transform your avocado toast recipe.

    Popular options include:

    • Sourdough bread – tangy flavor and sturdy texture

    • Whole grain bread – hearty and nutritious

    • Multigrain bread – adds nutty flavor

    • Rye bread – deeper, more robust taste

    • Gluten-free bread – perfect for dietary restrictions

    A thick slice of toasted bread helps support the creamy avocado without becoming soggy.
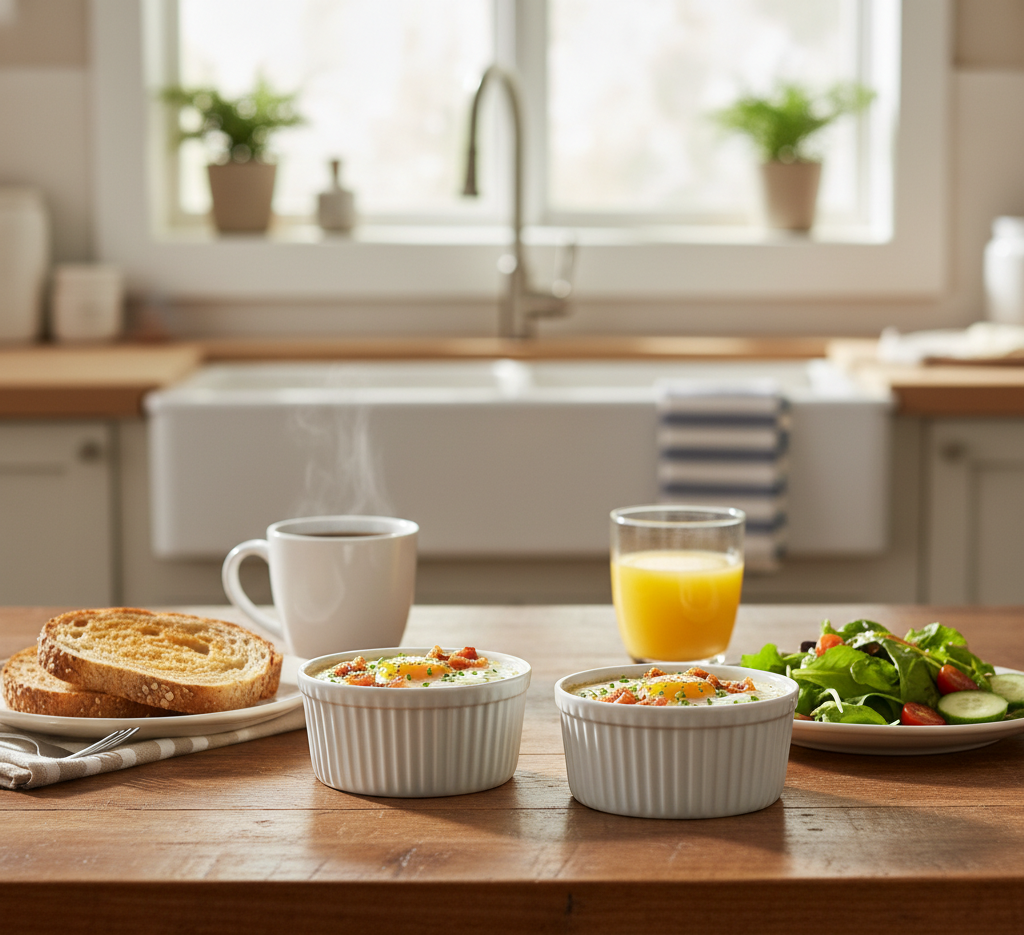
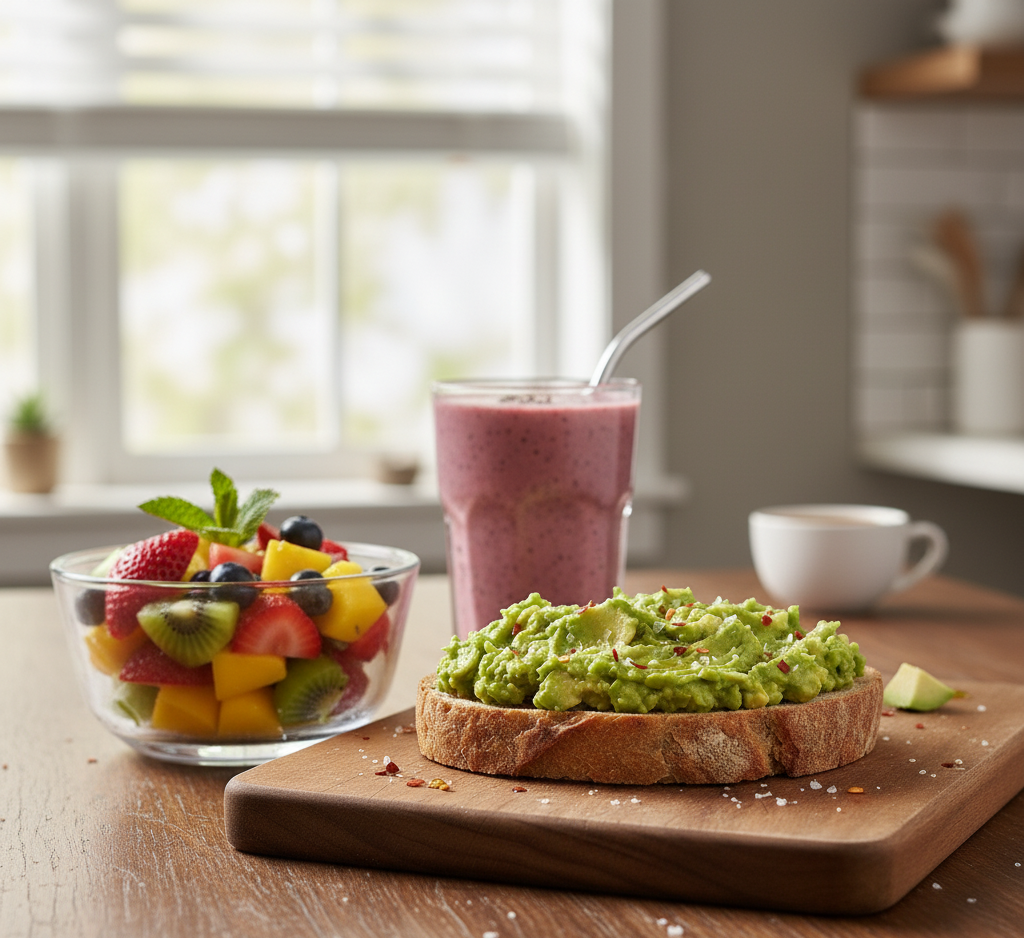
    Serving Suggestions

    Although avocado toast is often served for breakfast, it also works well for many other meals.

    Serve avocado toast with:

    • Fresh fruit salad

    • Scrambled eggs

    • Greek yogurt

    • Smoothies

    • Fresh green salad

    These combinations turn avocado toast into a complete and balanced meal.

    Common Mistakes to Avoid

    Even simple avocado toast recipes can go wrong if you’re not careful.

    Avoid these common mistakes:

    • Using unripe avocados

    • Choosing thin or soft bread

    • Not seasoning the avocado properly

    • Preparing it too early (which causes browning)

    Freshness and balance are key to making the perfect avocado toast.

    Frequently Asked Questions

    How do I know if an avocado is ripe?

    A ripe avocado should yield slightly when gently pressed but should not feel mushy.

    Can I make avocado toast ahead of time?

    It’s best served fresh, but you can prepare the avocado mixture ahead and store it with lemon juice to reduce browning.

    Is avocado toast healthy?

    Yes! Avocado toast provides healthy fats, fiber, and essential nutrients, making it a balanced meal when paired with protein.

    What spices go well with avocado toast?

    Popular choices include chili flakes, garlic powder, paprika, everything bagel seasoning, and fresh herbs.


    Conclusion

    Avocado toast proves that simple ingredients can create something truly special. With creamy avocado, crispy toasted bread, and endless topping possibilities, this dish is both satisfying and nutritious.

    Whether you prefer the classic version or one of the six easy avocado toast recipes above, this versatile meal fits perfectly into busy mornings, relaxed brunches, or quick lunches. Once you start experimenting with toppings and flavors, you’ll discover that avocado toast can be reinvented again and again.

  • Shrimp Salad Recipe and 9 Delicious Variations You’ll Want to Try

    Shrimp Salad Recipe and 9 Delicious Variations You’ll Want to Try

    A shrimp salad recipe is one of those timeless dishes that combines elegance with simplicity. Whether you’re preparing a light summer lunch, a quick dinner, or a crowd-pleasing dish for a gathering, shrimp salad delivers incredible flavor with minimal effort. Tender shrimp tossed in a creamy dressing with crunchy vegetables and fresh herbs creates a refreshing meal that feels both satisfying and light.

    What makes shrimp salad especially appealing is its versatility. You can serve it in lettuce cups, pile it onto toasted bread for a sandwich, or enjoy it as a protein-packed salad bowl. The classic version is delicious on its own, but once you start experimenting with flavors, the possibilities expand quickly. In this guide, you’ll learn the best shrimp salad recipe along with 9 tasty variations to keep things exciting in your kitchen.

    Why You’ll Love This Shrimp Salad Recipe

    There are many reasons home cooks love making this easy shrimp salad recipe. It’s quick to prepare, incredibly flavorful, and perfect for a wide variety of meals.

    Here’s why this recipe stands out:

    • Quick and easy: Ready in about 20 minutes

    • Healthy and protein-rich: Shrimp is naturally lean and nutritious

    • Perfect for meal prep: Tastes even better after chilling

    • Versatile serving options: Sandwiches, wraps, lettuce cups, or salad bowls

    • Great for warm weather meals: Light yet satisfying

    Another benefit of this homemade shrimp salad is that it can easily be customized based on what you already have in your kitchen. From Mediterranean flavors to spicy twists, there are endless ways to upgrade the classic version.

    Ingredients for the Classic Shrimp Salad

    This classic shrimp salad recipe uses simple ingredients that come together to create a creamy, refreshing dish.

    Main Ingredients:

    • 1 pound cooked shrimp, peeled and deveined

    • ½ cup mayonnaise

    • 1 tablespoon fresh lemon juice

    • ½ cup diced celery

    • 2 tablespoons finely chopped red onion

    • 1 tablespoon fresh dill or parsley

    • Salt and black pepper to taste

    Optional Add-ins:

    • 1 teaspoon Dijon mustard

    • 1 teaspoon Old Bay seasoning

    • Chopped green onions

    • A dash of hot sauce

    These ingredients form the base for a delicious creamy shrimp salad that balances richness, freshness, and texture.

    Ingredient Notes for the Best Flavor

    Choosing quality ingredients makes a noticeable difference in this shrimp salad recipe.

    Shrimp

    Fresh or frozen shrimp both work well. Medium or large shrimp are ideal because they provide a satisfying bite. If using frozen shrimp, thaw them completely and pat them dry before mixing.

    Mayonnaise

    A good-quality mayonnaise creates the creamy base of the dressing. Some cooks like to replace half the mayo with Greek yogurt for a lighter version.

    Fresh Herbs

    Dill, parsley, or chives add brightness and depth to the shrimp salad. Fresh herbs are always preferred over dried.

    Step-by-Step Instructions

    Making this easy shrimp salad recipe takes only a few simple steps.

    1. Prepare the Shrimp

    If the shrimp are large, chop them into bite-sized pieces. Leave smaller shrimp whole.

    2. Mix the Dressing

    In a medium bowl, combine mayonnaise, lemon juice, Dijon mustard (optional), salt, and pepper.

    3. Add the Vegetables

    Stir in the diced celery, red onion, and fresh herbs.

    4. Combine the Shrimp

    Add the shrimp and gently fold everything together until well coated.

    5. Chill Before Serving

    Cover and refrigerate the shrimp salad for at least 20–30 minutes so the flavors can develop.

    9 Delicious Shrimp Salad Variations

    Once you master the classic shrimp salad recipe, you can easily create exciting flavor variations.

    1. Avocado Shrimp Salad

    Add diced avocado for a creamy, fresh twist.

    2. Mediterranean Shrimp Salad

    Mix in olives, cucumbers, feta cheese, and oregano.

    3. Spicy Shrimp Salad

    Add sriracha, cayenne pepper, and chopped jalapeños.

    4. Mango Shrimp Salad

    Combine diced mango, lime juice, and cilantro for a tropical flavor.

    5. Cajun Shrimp Salad

    Season shrimp with Cajun spices and add green onions.

    6. Greek Yogurt Shrimp Salad

    Replace half the mayo with Greek yogurt for a lighter option.

    7. Dill Pickle Shrimp Salad

    Add chopped pickles and a splash of pickle juice.

    8. Lemon Herb Shrimp Salad

    Increase lemon zest and add basil and parsley.

    9. Shrimp Pasta Salad

    Mix the shrimp salad with cooked pasta for a hearty meal.

    What to Serve with Shrimp Salad

    This creamy shrimp salad recipe pairs beautifully with many side dishes.

    Popular serving ideas include:

    • Toasted brioche or sandwich bread

    • Butter lettuce cups

    • Crackers or crostini

    • Fresh green salad

    • Avocado toast

    • Pasta or grain bowls

    You can also serve shrimp salad in a wrap or stuffed inside a baked potato for a creative twist.

    Storage and Meal Prep Tips

    This homemade shrimp salad recipe is excellent for meal prep.

    Refrigeration:
    Store shrimp salad in an airtight container in the refrigerator for up to 2 days.

    Avoid Freezing:
    Because of the mayonnaise base, shrimp salad does not freeze well.

    Make Ahead Tip:
    Prepare the salad a few hours before serving to allow the flavors to blend.

    Common Mistakes to Avoid

    Even a simple shrimp salad recipe can go wrong if you overlook a few key details.

    Avoid these mistakes:

    • Using overcooked shrimp which can become rubbery

    • Adding too much dressing which makes the salad heavy

    • Skipping the chilling step which helps flavors develop

    • Not seasoning properly with salt, lemon, or herbs

    Taking a few extra minutes to balance the flavors will make your shrimp salad taste restaurant-quality.

    Frequently Asked Questions

    Can I use frozen shrimp for shrimp salad?

    Yes! Frozen shrimp work perfectly. Just thaw them completely and pat them dry before mixing them into the salad.

    How long does shrimp salad last in the refrigerator?

    Shrimp salad typically lasts 1–2 days when stored in an airtight container in the refrigerator.

    What size shrimp is best for shrimp salad?

    Medium or large shrimp work best because they provide a better texture and flavor.

    Can I make shrimp salad without mayonnaise?

    Absolutely. You can substitute Greek yogurt, sour cream, or mashed avocado for a lighter alternative.


    Conclusion

    This shrimp salad recipe proves that simple ingredients can create a truly impressive dish. Creamy, fresh, and packed with flavor, shrimp salad is perfect for lunches, light dinners, picnics, or meal prep. Once you try the classic version, experimenting with the 9 delicious shrimp salad variations will open up a whole new world of flavor.

    Whether you enjoy it in sandwiches, lettuce wraps, or straight from the bowl, this versatile dish is guaranteed to become a favorite in your recipe collection. With minimal preparation and endless customization options, shrimp salad is one of those recipes you’ll return to again and again.

  • Fluffy Spinach Omelette: The Perfect Quick Dinner Recipe

    Fluffy Spinach Omelette: The Perfect Quick Dinner Recipe

    When you need a quick, satisfying dinner that doesn’t require hours in the kitchen, a fluffy spinach omelette is one of the best solutions. This simple yet delicious dish combines protein-rich eggs with nutrient-packed spinach to create a meal that feels light but incredibly satisfying. Whether you’re cooking for yourself after a long day or preparing a simple evening meal for your family, this spinach omelette recipe is a reliable go-to.

    The beauty of this recipe lies in its balance: it’s easy enough for beginner cooks yet versatile enough to adapt with your favorite ingredients. In just a few minutes, you can transform basic pantry staples into a warm, comforting dish that tastes like it came from your favorite brunch café.

    Why You’ll Love This Fluffy Spinach Omelette

    A spinach omelette for dinner might sound simple, but it offers incredible flavor and nutrition in every bite. Here are some reasons why this recipe deserves a spot in your weekly meal rotation.

    • Quick to prepare – Ready in under 10 minutes

    • Healthy and nutritious – Loaded with vitamins and protein

    • Perfect for dinner or breakfast – A versatile meal any time of day

    • Customizable – Add cheese, mushrooms, herbs, or tomatoes

    • Low-carb and gluten-free – Ideal for many dietary preferences

    Many home cooks love making a fluffy omelette with spinach because it feels light while still being filling. It’s also a fantastic way to include more leafy greens in your diet without sacrificing taste.

    Ingredients

    This easy spinach omelette recipe uses simple ingredients you likely already have in your kitchen.

    Main Ingredients:

    • 3 large eggs

    • 1 cup fresh spinach (roughly chopped)

    • 1 tablespoon butter or olive oil

    • 2 tablespoons milk or cream

    • Salt to taste

    • Black pepper to taste

    Optional Add-ins:

    • ¼ cup shredded cheese (cheddar, mozzarella, or feta)

    • 1 tablespoon chopped onions

    • 1 tablespoon diced tomatoes

    • Fresh herbs like parsley or chives

    These ingredients create a classic moist spinach omelette with a rich texture and delicate flavor.

    Ingredient Notes

    Choosing quality ingredients can make a big difference in the flavor and texture of your fluffy spinach omelette.

    Eggs

    Fresh, high-quality eggs are essential. They provide structure and richness while creating that soft, fluffy texture every omelette needs.

    Spinach

    Fresh spinach works best because it wilts quickly and keeps a vibrant color. Baby spinach is especially tender and perfect for omelettes.

    Dairy

    Adding a small splash of milk or cream helps create a light and fluffy omelette texture.

    Step-by-Step Instructions

    Making the perfect fluffy spinach omelette for dinner is easier than you might think.

    1. Beat the Eggs

    In a medium bowl, whisk together the eggs, milk, salt, and pepper until fully combined. Whisking incorporates air, which helps the omelette become light and fluffy.

    2. Cook the Spinach

    Heat butter or olive oil in a non-stick skillet over medium heat. Add the chopped spinach and cook for about 1 minute until wilted.

    3. Add the Eggs

    Pour the egg mixture into the skillet over the spinach. Let it cook undisturbed for about 30 seconds before gently pushing the edges toward the center.

    4. Add Cheese (Optional)

    Sprinkle shredded cheese on top once the eggs are mostly set.

    5. Fold the Omelette

    Use a spatula to fold the omelette in half. Cook for another 30 seconds until fully set but still soft inside.

    6. Serve Immediately

    Slide the omelette onto a plate and garnish with fresh herbs if desired.

    Tips for Perfect Results

    To make the best fluffy spinach omelette, keep these expert cooking tips in mind:

    • Use medium heat to prevent the eggs from browning too quickly

    • Whisk the eggs well to incorporate air

    • Use a non-stick skillet for easy folding

    • Don’t overcook — the omelette should remain soft and slightly creamy inside

    • Cook spinach briefly so it doesn’t release too much moisture

    Following these tips will help you achieve a restaurant-quality omelette every time.

    Delicious Variations

    Once you master the basic spinach omelette recipe, you can experiment with many tasty variations.

    Cheese Spinach Omelette

    Add cheddar, Swiss, or feta for extra richness.

    Mediterranean Spinach Omelette

    Include olives, tomatoes, and feta cheese.

    Mushroom Spinach Omelette

    Sauté sliced mushrooms with the spinach for deeper flavor.

    Protein-Packed Omelette

    Add diced turkey, chicken, or smoked salmon.

    These variations make it easy to enjoy a quick spinach omelette dinner without getting bored.

    What to Serve With a Spinach Omelette

    This fluffy spinach omelette pairs wonderfully with many side dishes.

    Great serving ideas include:

    • Toasted sourdough bread

    • Fresh avocado slices

    • A light green salad

    • Roasted potatoes

    • Fresh fruit

    These sides help transform a simple omelette into a balanced and satisfying dinner.

    Storage & Reheating

    Although omelettes taste best fresh, you can still store leftovers.

    Refrigeration:
    Place the cooled omelette in an airtight container and refrigerate for up to 2 days.

    Reheating:
    Reheat gently in a skillet over low heat or microwave for about 30–40 seconds.

    Avoid overheating because it can make the eggs rubbery.

    Common Mistakes to Avoid

    Even a simple spinach omelette recipe can go wrong if you’re not careful.

    Here are common mistakes:

    • Cooking on too high heat

    • Overfilling the omelette

    • Not whisking eggs properly

    • Overcooking the eggs

    • Using too much spinach

    Avoiding these mistakes ensures a perfectly soft omelette every time.

    FAQs

    1. Can I make a spinach omelette without milk?

    Yes! Milk helps create fluffiness, but you can skip it. The omelette will still taste delicious.

    2. Can I use frozen spinach?

    You can, but make sure to thaw and squeeze out excess water first.

    3. How do I make my omelette extra fluffy?

    Whisk the eggs well and cook them over medium-low heat. Some cooks also add a tablespoon of water or milk.

    4. Is a spinach omelette healthy for dinner?

    Absolutely. It’s high in protein, low in carbs, and packed with nutrients from spinach.


    Final Thoughts

    A fluffy spinach omelette is proof that simple ingredients can create an incredibly satisfying meal. Whether you’re preparing a quick weeknight dinner or a cozy breakfast-for-dinner option, this recipe delivers flavor, nutrition, and convenience.

    With its tender eggs, vibrant spinach, and endless customization options, this easy spinach omelette recipe will quickly become one of your favorite quick meals. Once you master the technique, you’ll find yourself returning to this comforting dish again and again.

  • Simple and Healthy Savory Breakfast for the Whole Family

    Simple and Healthy Savory Breakfast for the Whole Family

    If you’re tired of sugary breakfasts and want something more balanced, a simple and healthy savory breakfast for the whole family is the perfect solution. Savory breakfasts are satisfying, packed with protein, and help keep everyone energized throughout the morning. Instead of relying on pastries or sweet cereals, this recipe focuses on wholesome ingredients like eggs, vegetables, whole grains, and healthy fats.

    This simple and healthy savory breakfast for the whole family is designed to be quick, nourishing, and incredibly versatile. It works well for busy weekday mornings but is also delicious enough for a relaxed weekend brunch. The combination of fluffy eggs, sautéed vegetables, and crispy toast creates a balanced meal that both kids and adults will love.

    Why You’ll Love This Recipe

    A simple and healthy savory breakfast for the whole family should be easy to prepare while still delivering great nutrition and flavor. This recipe checks all those boxes.

    Here are a few reasons families love this breakfast idea:

    • Ready in under 20 minutes

    • Packed with protein and fiber

    • Uses simple everyday ingredients

    • Customizable for picky eaters

    • Perfect for meal prep

    • Balanced and energizing

    Unlike many traditional breakfasts that rely on refined sugar, this savory breakfast keeps energy levels stable and helps everyone stay full until lunchtime.

    Ingredients

    This simple and healthy savory breakfast for the whole family uses fresh ingredients that come together quickly for a nutritious morning meal.

    Main Ingredients

    • 6 large eggs

    • 1 tablespoon olive oil or butter

    • 1 small bell pepper (diced)

    • 1 small zucchini (diced)

    • ½ cup mushrooms (sliced)

    • 1 cup fresh spinach

    • 4 slices whole grain bread

    • 1 avocado (sliced)

    • Salt and black pepper to taste

    • Optional: shredded cheese, cherry tomatoes, or herbs

    These ingredients create a hearty and balanced breakfast that includes protein, healthy fats, and vegetables.

    Ingredient Notes

    When preparing a simple and healthy savory breakfast for the whole family, choosing fresh, quality ingredients makes a big difference in flavor and nutrition.

    Eggs are the main protein source and provide essential vitamins and minerals. Whole grain bread adds fiber and helps keep you feeling full longer. Vegetables like zucchini, peppers, and spinach add color, texture, and nutrients without adding unnecessary calories.

    You can also customize the ingredients depending on what you have in your refrigerator. Broccoli, tomatoes, kale, or onions all work beautifully in this recipe.


    Step-by-Step Instructions

    Step 1: Prepare the Vegetables

    Start by heating olive oil in a large skillet over medium heat. Add the diced bell peppers, zucchini, and mushrooms. Sauté for about 4–5 minutes until the vegetables soften and become slightly golden.

    Cooking the vegetables first helps release their natural sweetness and ensures they blend perfectly with the eggs.

    Step 2: Add the Spinach

    Stir in the fresh spinach and cook for about one minute until it wilts. Spinach cooks quickly and adds both color and nutrients to the dish.

    This step transforms the simple and healthy savory breakfast for the whole family into a veggie-packed meal that feels both light and satisfying.

    Step 3: Cook the Eggs

    In a bowl, whisk the eggs with a pinch of salt and pepper. Pour them into the skillet with the vegetables and gently scramble over medium heat until fluffy and fully cooked.

    Stir slowly to create soft, creamy eggs that coat the vegetables beautifully.

    Step 4: Toast the Bread and Assemble

    Toast the whole grain bread until crispy and golden. Top with avocado slices and serve alongside the vegetable scrambled eggs.

    This final step completes the simple and healthy savory breakfast for the whole family, turning it into a balanced plate filled with flavor and nutrition.

    Tips for Perfect Results

    To make the best simple and healthy savory breakfast for the whole family, keep these tips in mind:

    • Cook eggs over medium heat for soft texture

    • Avoid overcooking vegetables to keep them vibrant

    • Use fresh herbs like parsley or chives for extra flavor

    • Add cheese only at the end to prevent dryness

    • Slice avocado right before serving to keep it fresh

    Small details like these elevate the overall taste and presentation of your breakfast.


    Variations

    One of the best parts about this simple and healthy savory breakfast for the whole family is how easy it is to customize.

    Try these variations:

    • Mediterranean version: add feta cheese, tomatoes, and olives

    • Protein boost: include turkey sausage or smoked salmon

    • Low-carb option: skip toast and serve with extra avocado

    • Spicy twist: add chili flakes or hot sauce

    • Cheesy breakfast: sprinkle shredded cheddar or mozzarella

    These variations keep breakfast exciting while still maintaining the healthy foundation of the recipe.


    What to Serve With It

    This simple and healthy savory breakfast for the whole family pairs wonderfully with a few light sides.

    Great serving ideas include:

    • Fresh fruit salad

    • Greek yogurt with honey

    • Smoothies

    • Fresh orange juice

    • Herbal tea or coffee

    Together, these additions create a complete breakfast that feels both indulgent and nourishing.

    Storage & Reheating

    If you have leftovers, the egg and vegetable mixture from this simple and healthy savory breakfast for the whole family stores surprisingly well.

    Storage tips:

    • Store in an airtight container in the refrigerator for up to 3 days

    • Reheat gently in a skillet over low heat

    • Add a splash of milk when reheating to keep eggs soft

    For meal prep, cook the vegetable mixture ahead of time and scramble fresh eggs each morning.


    Common Mistakes

    Even simple recipes can go wrong if a few key details are overlooked.

    Common mistakes include:

    • Cooking eggs over high heat

    • Overcrowding the pan with vegetables

    • Adding spinach too early

    • Over-toasting the bread

    • Not seasoning properly

    Avoiding these mistakes ensures your simple and healthy savory breakfast for the whole family turns out perfect every time.


    FAQs

    Is a savory breakfast healthier than a sweet one?

    Savory breakfasts often contain more protein and fewer added sugars, which helps maintain steady energy levels throughout the morning.

    Can I prepare this breakfast ahead of time?

    Yes! You can prep the vegetables the night before to make cooking faster in the morning.

    Can kids enjoy this savory breakfast?

    Absolutely. The ingredients are mild, nutritious, and easy to customize for children.

    Can I make this dairy-free?

    Yes. Simply skip the cheese or use a dairy-free alternative.


    Final Thoughts

    A simple and healthy savory breakfast for the whole family is one of the best ways to start the day with energy and satisfaction. With fluffy eggs, colorful vegetables, crispy toast, and creamy avocado, this breakfast delivers flavor, nutrition, and comfort in every bite.

    The best part is how flexible and easy it is to prepare. Whether you’re cooking for busy school mornings or a relaxed weekend brunch, this recipe will quickly become a staple in your kitchen. Once your family tries it, they’ll look forward to this nourishing savory breakfast again and again.

  • Oeufs Cocotte Façon Carbonara – The Ultimate Creamy Baked Egg Recipe

    Oeufs Cocotte Façon Carbonara – The Ultimate Creamy Baked Egg Recipe

    If you love the comforting flavors of carbonara and the elegance of baked eggs, Oeufs Cocotte Façon Carbonara is about to become your new favorite recipe. This dish blends silky cream, savory bacon, and perfectly baked eggs into a warm, indulgent breakfast or brunch that feels both rustic and refined. Traditionally served in small ramekins, oeufs cocotte are known for their delicate texture and luxurious presentation, and adding carbonara-inspired ingredients takes them to the next level.

    What makes this recipe so appealing is how easy it is to prepare while still looking impressive on the table. Whether you’re hosting brunch guests or simply treating yourself to a cozy morning meal, Oeufs Cocotte Façon Carbonara delivers restaurant-quality flavor with minimal effort.

    Why You’ll Love This Recipe

    There are countless reasons to fall in love with Oeufs Cocotte Façon Carbonara. First, it combines two beloved classics—baked eggs and carbonara—into one irresistible dish. The creamy base gently cooks the eggs, creating tender whites and runny yolks that mix beautifully with the salty bacon and cheese.

    You’ll also love this recipe because:

    • It’s quick and easy to prepare

    • It feels luxurious but uses simple ingredients

    • It’s perfect for brunch, breakfast, or even a light dinner

    • It’s customizable with different cheeses and toppings

    This is comfort food with a French twist and Italian inspiration, all in one cozy ramekin.


    Ingredients

    To make Oeufs Cocotte Façon Carbonara, you’ll need the following ingredients:

    • Large eggs

    • Heavy cream or crème fraîche

    • Bacon or pancetta, diced

    • Grated Parmesan or Pecorino cheese

    • Butter (for greasing ramekins)

    • Salt and freshly ground black pepper

    • Optional: garlic, chives, or parsley

    These simple ingredients come together to create a deeply flavorful and creamy baked egg dish that feels special without being complicated.

    Ingredient Notes

    The quality of ingredients matters for this recipe. Use fresh eggs for the best texture and flavor. Pancetta adds a more authentic carbonara feel, but bacon works just as well and is easier to find. Parmesan or Pecorino cheese gives the dish its signature savory depth, while heavy cream creates a velvety base for the eggs.

    Fresh herbs like chives or parsley brighten the dish and balance the richness. Always season lightly at first since bacon and cheese already bring saltiness.


    Step-by-Step Instructions

    H3: Prepare the Ramekins

    Preheat your oven to 375°F (190°C). Butter each ramekin generously to prevent sticking. Add a spoonful of cream to the bottom of each dish.

    H3: Cook the Bacon

    In a skillet, cook the diced bacon or pancetta until crispy. Drain on paper towels and set aside.

    H3: Assemble the Oeufs Cocotte

    Sprinkle bacon and grated cheese into each ramekin. Crack one egg gently into each dish. Add another spoonful of cream on top and season with black pepper.

    H3: Bake to Perfection

    Place ramekins in a baking dish filled halfway with hot water (water bath). Bake for 12–15 minutes until whites are set but yolks remain slightly runny.

    Tips for Perfect Results

    For the best Oeufs Cocotte Façon Carbonara, use a water bath to ensure gentle, even cooking. This prevents the eggs from becoming rubbery. Keep a close eye on baking time—every oven is different, and overbaking can result in firm yolks.

    Let the ramekins rest for one minute before serving to allow the cream to thicken slightly. Finish with freshly cracked black pepper and herbs for a professional touch.


    Variations

    This recipe is wonderfully adaptable:

    • Vegetarian: Skip bacon and add sautéed mushrooms or spinach

    • Cheesy: Use Gruyère or Swiss cheese instead of Parmesan

    • Spicy: Add chili flakes or cracked red pepper

    • Garlic Lover’s Version: Infuse the cream with roasted garlic

    Each variation keeps the heart of Oeufs Cocotte Façon Carbonara while offering a new flavor profile.


    What to Serve With It

    Oeufs Cocotte Façon Carbonara pairs beautifully with:

    • Crusty baguette or sourdough toast

    • Fresh fruit salad

    • Light green salad with vinaigrette

    • Freshly brewed coffee or tea

    Storage & Reheating

    This dish is best enjoyed fresh, but leftovers can be stored in the refrigerator for up to one day. Reheat gently in the oven at low temperature or in the microwave for short intervals. Be aware that reheating will firm up the yolk more than when freshly baked.

    For meal prep, you can prepare the bacon and cheese mixture ahead of time and assemble just before baking.


    Common Mistakes

    One common mistake is baking at too high a temperature, which can cause the eggs to cook unevenly. Skipping the water bath may result in dry or rubbery texture. Another error is oversalting—remember that bacon and cheese already contain salt.

    Using low-quality cheese can also affect flavor, so choose a good Parmesan or Pecorino for best results.


    FAQs

    Q1: Can I make Oeufs Cocotte Façon Carbonara ahead of time?
    It’s best served fresh, but you can prep ingredients in advance and bake just before serving.

    Q2: How do I know when the eggs are done?
    The whites should be set and the yolks slightly jiggly in the center.

    Q3: Can I use milk instead of cream?
    Yes, but the texture will be less rich and creamy.

    Q4: Is this recipe suitable for brunch parties?
    Absolutely. It’s elegant, easy to portion, and always impresses guests.


    Final Thoughts

    Oeufs Cocotte Façon Carbonara is the ultimate comfort-meets-elegance recipe. With its creamy texture, savory bacon, and gently baked eggs, it transforms simple ingredients into a dish that feels luxurious and satisfying. Perfect for brunch, breakfast, or even a light dinner, this recipe brings warmth and indulgence to any table.

    Once you try this carbonara-inspired baked egg dish, it’s sure to become a staple in your kitchen—simple, rich, and incredibly delicious.

  • Easy Keto Recipe: Garlic Butter Chicken with Asparagus

    Easy Keto Recipe: Garlic Butter Chicken with Asparagus

    If you’re searching for a simple, satisfying, and low-carb dinner, this Easy Keto Recipe: Garlic Butter Chicken with Asparagus is about to become your new go-to meal. It combines juicy chicken breasts with crisp-tender asparagus in a rich garlic butter sauce that feels indulgent while staying completely keto-friendly. Best of all, everything comes together in one pan, making cleanup quick and painless.

    This recipe is perfect for busy weeknights, meal prep, or when you want something comforting without breaking your low-carb lifestyle. The balance of protein, healthy fats, and vegetables keeps you full and energized, while the garlic butter sauce adds restaurant-quality flavor to everyday ingredients.

    Why You’ll Love This Recipe

    This garlic butter chicken with asparagus recipe checks every box for a successful keto dinner. It’s fast, flavorful, and made with ingredients you likely already have in your fridge.

    You’ll love this recipe because:

    • It’s ready in about 25–30 minutes

    • It’s naturally low-carb and keto-friendly

    • It uses one pan for easy cleanup

    • It’s rich, buttery, and full of garlic flavor

    • It works for dinner, lunch, or meal prep

    This dish proves that keto meals don’t have to be boring or complicated to be delicious.


    Ingredients

    To make this easy keto garlic butter chicken with asparagus, you’ll need:

    • 2 large boneless, skinless chicken breasts (sliced lengthwise)

    • 1 bunch fresh asparagus, trimmed

    • 3 tablespoons butter

    • 1 tablespoon olive oil

    • 4 cloves garlic, minced

    • ½ teaspoon paprika

    • ½ teaspoon Italian seasoning

    • Salt and black pepper to taste

    • Juice of ½ lemon (optional)

    • Optional garnish: fresh parsley or grated Parmesan

    These simple ingredients come together to create a bold, buttery sauce that coats the chicken and asparagus beautifully.

    Ingredient Notes

    Chicken

    Chicken breasts are lean and cook quickly, making them ideal for keto dinners. You can also use chicken thighs for a juicier, richer flavor.

    Asparagus

    Asparagus is naturally low in carbs and pairs perfectly with garlic butter. Choose firm, bright green stalks for the best texture.

    Butter & Olive Oil

    Butter provides richness while olive oil prevents burning and adds depth of flavor.

    Garlic & Seasonings

    Fresh garlic is the star of this recipe, giving the dish its bold aroma and savory taste. Paprika and Italian seasoning add warmth without overpowering the chicken.


    Step-by-Step Instructions

    1. Season both sides of the chicken with salt, pepper, paprika, and Italian seasoning.

    2. Heat olive oil and 1 tablespoon butter in a large skillet over medium heat.

    3. Add chicken and cook for 5–6 minutes per side until golden and cooked through. Remove and set aside.

    4. In the same skillet, add remaining butter and minced garlic. Sauté for 30 seconds until fragrant.

    5. Add asparagus and cook for 4–5 minutes until tender but still crisp.

    6. Return chicken to the pan and spoon garlic butter sauce over the top.

    7. Finish with lemon juice and fresh herbs before serving.

    This one-pan method locks in flavor while keeping the chicken juicy and the asparagus vibrant.

    Tips for Perfect Results

    • Slice chicken evenly so it cooks at the same rate.

    • Don’t overcrowd the pan—cook in batches if needed.

    • Use fresh garlic for the best flavor.

    • Add lemon juice at the end to brighten the butter sauce.

    • Let the chicken rest for a few minutes before serving.

    These small steps make your garlic butter chicken with asparagus taste restaurant-quality every time.


    Variations

    This recipe is easy to customize depending on your taste:

    • Spicy Version: Add red pepper flakes or cayenne pepper.

    • Creamy Keto: Stir in a splash of heavy cream at the end.

    • Cheesy Twist: Sprinkle Parmesan or mozzarella over the chicken before serving.

    • Herb Lover’s: Add thyme or rosemary for deeper flavor.

    • Lemon Garlic: Double the lemon juice for a brighter profile.

    Each variation keeps the heart of the easy keto garlic butter chicken with asparagus while offering a new flavor experience.


    What to Serve With It

    This dish pairs beautifully with other low-carb sides such as:

    • Cauliflower rice

    • Zucchini noodles

    • Simple green salad

    • Roasted mushrooms

    • Keto dinner rolls

    These sides complete the meal while keeping it keto-friendly and satisfying.

    Storage & Reheating

    • Store leftovers in an airtight container in the refrigerator for up to 4 days.

    • Reheat gently in a skillet or microwave until warm.

    • Add a small pat of butter when reheating to restore moisture.

    • This dish can be frozen for up to 2 months (best without asparagus for freezing).

    It’s perfect for meal prep and next-day lunches.


    Common Mistakes

    • Overcooking the chicken until dry

    • Burning the garlic by cooking it too long

    • Using too much heat and separating the butter sauce

    • Skipping seasoning

    • Overcooking the asparagus until mushy

    Avoiding these mistakes ensures tender chicken and crisp asparagus every time.


    FAQs

    Q1: Is garlic butter chicken with asparagus keto-friendly?
    Yes, it’s naturally low in carbs and high in healthy fats and protein.

    Q2: Can I make this recipe ahead of time?
    Absolutely. Cook it fully and reheat when ready to serve.

    Q3: Can I use frozen asparagus?
    Yes, but fresh asparagus gives the best texture. If using frozen, thaw and pat dry first.

    Q4: What cut of chicken works best?
    Chicken breasts are great, but thighs work well if you prefer juicier meat.


    Final Thoughts

    This Easy Keto Recipe: Garlic Butter Chicken with Asparagus is proof that low-carb meals can be rich, comforting, and incredibly flavorful. With juicy chicken, tender asparagus, and a buttery garlic sauce, this dish feels indulgent while staying perfectly keto-friendly.

    Whether you’re cooking for your family, prepping meals for the week, or simply craving a fast and healthy dinner, this recipe delivers every time. Once you try it, it’s sure to earn a permanent spot in your weekly meal rotation.

  • Flavorful Mediterranean Chicken Tenders Recipe – Easy 30-Min Dinner

    Flavorful Mediterranean Chicken Tenders Recipe – Easy 30-Min Dinner

    When you need a fast, healthy, and satisfying dinner, this Flavorful Mediterranean Chicken Tenders Recipe – Easy 30-Min Dinner is the perfect solution. Juicy chicken tenders are marinated in olive oil, lemon juice, garlic, and warm Mediterranean spices, then cooked until golden and tender. The result is a bright, savory dish that tastes like something you’d order at a Mediterranean café—but it’s easy enough to make at home on a busy weeknight.

    This recipe focuses on simple ingredients and bold flavors. Mediterranean cooking is known for using herbs, citrus, and olive oil to create meals that are both delicious and nourishing. These chicken tenders are great for families, meal prep, and anyone who wants a lighter dinner that doesn’t sacrifice taste.

    Why You’ll Love This Recipe

    This Mediterranean chicken tenders recipe is designed to fit real life. It’s quick, flexible, and made with pantry-friendly ingredients. The marinade infuses the chicken with flavor in just a short time, and the cooking process takes less than 15 minutes.

    You’ll love this recipe because:

    • It’s ready in about 30 minutes from start to finish

    • It uses healthy Mediterranean ingredients

    • It’s kid-friendly and adult-approved

    • It works for dinner, lunch, or meal prep

    • It pairs well with many side dishes

    Once you try it, this will become one of your go-to easy chicken dinners.


    Ingredients

    To make this flavorful Mediterranean chicken tenders recipe, you’ll need:

    • 1½ pounds chicken tenders

    • 3 tablespoons olive oil

    • Juice of 1 lemon

    • 3 cloves garlic, minced

    • 1 teaspoon dried oregano

    • 1 teaspoon paprika

    • ½ teaspoon cumin

    • ½ teaspoon onion powder

    • Salt and black pepper to taste

    • Optional garnish: fresh parsley or dill

    These ingredients come together to create a bold, herby marinade that makes the chicken incredibly juicy and aromatic.

    Ingredient Notes

    Chicken Tenders

    Chicken tenders cook quickly and stay tender without much effort. You can also use sliced chicken breasts if tenders are unavailable.

    Olive Oil & Lemon

    Olive oil keeps the chicken moist while lemon juice adds brightness and helps tenderize the meat. This combination is classic in Mediterranean cooking.

    Spices

    Oregano, paprika, and cumin create a warm, savory profile. You can adjust the spice levels to match your taste.

    Fresh Herbs

    Parsley or dill added at the end brings freshness and color to the finished dish.


    Step-by-Step Instructions

    1. In a large bowl, whisk together olive oil, lemon juice, garlic, oregano, paprika, cumin, salt, and pepper.

    2. Add chicken tenders and toss to coat evenly. Let marinate for 10–15 minutes.

    3. Heat a large skillet over medium heat with a drizzle of olive oil.

    4. Cook the chicken tenders for 4–5 minutes per side until golden and cooked through.

    5. Remove from heat and garnish with fresh herbs and extra lemon juice before serving.

    This method ensures juicy, flavorful chicken every time with minimal cleanup.

    Tips for Perfect Results

    • Don’t skip the marinade—it’s the key to flavor.

    • Cook chicken in a single layer for even browning.

    • Use a meat thermometer to avoid overcooking (165°F internal temp).

    • Add lemon juice at the end for extra brightness.

    • Let the chicken rest for a few minutes before serving.

    These small steps make your Mediterranean chicken tenders recipe taste restaurant-quality.


    Variations

    This recipe is easy to customize depending on your preferences:

    • Spicy Mediterranean Chicken: Add red pepper flakes or cayenne.

    • Garlic Lover’s Version: Double the garlic for extra punch.

    • Herb Blend: Add thyme or rosemary for deeper flavor.

    • Baked Option: Bake at 400°F for 18–20 minutes instead of pan-frying.

    • Air Fryer Version: Cook at 375°F for 10–12 minutes, flipping halfway.

    Each variation keeps the core Mediterranean flavor while offering something new.


    What to Serve With It

    These chicken tenders pair perfectly with:

    • Greek salad with cucumber and tomato

    • Roasted potatoes or sweet potatoes

    • Rice or quinoa

    • Warm pita bread and hummus

    • Steamed green beans or zucchini

    Serving them with fresh sides creates a balanced and satisfying meal.

    Storage & Reheating

    • Store leftovers in an airtight container in the refrigerator for up to 4 days.

    • Reheat gently in a skillet or microwave until warm.

    • Freeze cooked chicken tenders for up to 2 months.

    • Add fresh herbs and lemon juice after reheating for best flavor.

    This makes the recipe ideal for meal prep and next-day lunches.


    Common Mistakes

    • Over-marinating with too much lemon juice (can toughen chicken)

    • Overcrowding the pan

    • Cooking on high heat and burning spices

    • Forgetting to season properly

    • Overcooking until dry

    Avoiding these mistakes ensures juicy, flavorful results every time.


    FAQs

    Q1: Can I make this Mediterranean chicken tenders recipe ahead of time?
    Yes, you can marinate the chicken up to 24 hours in advance and cook when ready.

    Q2: Is this recipe healthy?
    Absolutely. It uses lean protein, olive oil, and herbs with no heavy sauces.

    Q3: Can I grill these chicken tenders?
    Yes, grilling adds a smoky flavor and works very well with this marinade.

    Q4: What dipping sauces go well with this recipe?
    Tzatziki, hummus, or garlic yogurt sauce pair perfectly with Mediterranean chicken tenders.


    Final Thoughts

    This Flavorful Mediterranean Chicken Tenders Recipe – Easy 30-Min Dinner proves that simple ingredients can create bold, unforgettable flavor. With its juicy texture, bright lemon notes, and warm spices, it’s a dish that feels both comforting and fresh.

    Whether you’re cooking for family, prepping lunches, or hosting friends, this recipe fits every occasion. Once you add it to your weekly menu, it’s sure to become a reliable favorite that everyone asks for again and again.

  • Meta Description: Coconut chicken rice bowl is a creamy, flavorful meal with tender chicken, coconut-infused rice, and fresh toppings—perfect for easy dinners or meal prep.

    Meta Description: Coconut chicken rice bowl is a creamy, flavorful meal with tender chicken, coconut-infused rice, and fresh toppings—perfect for easy dinners or meal prep.

    If you’re craving a dinner that’s comforting, colorful, and full of bold flavor, this Coconut Chicken Rice Bowl is exactly what you need. Tender chicken simmered in a creamy coconut sauce, served over fluffy rice, and topped with fresh herbs and vegetables creates a balanced meal that feels both cozy and refreshing. It’s inspired by tropical flavors but designed for busy American kitchens where quick, wholesome dinners matter.

    This coconut chicken rice bowl is perfect for weeknights, lunch meal prep, or even casual entertaining. The ingredients are simple, the steps are easy to follow, and the result looks like something you’d order at a trendy bowl restaurant. With just one pan and one pot, you can build a dinner that’s rich in flavor and nutrition.

    Why You’ll Love This Recipe

    This coconut chicken rice bowl is a true crowd-pleaser. It’s creamy without being heavy, savory with just a hint of sweetness, and endlessly customizable. Whether you’re cooking for your family or preparing meals for the week, this recipe fits perfectly into your routine.

    You’ll love this recipe because:

    • It’s quick and easy to prepare

    • It uses pantry-friendly ingredients

    • It’s naturally dairy-free

    • It works great for meal prep

    • It’s customizable with vegetables and toppings

    Once you try this coconut chicken rice bowl, it will quickly become a go-to dinner in your rotation.


    Ingredients

    To make this flavorful coconut chicken rice bowl, gather the following:

    • 1 pound boneless, skinless chicken breast, diced

    • 1 tablespoon olive oil

    • 2 cloves garlic, minced

    • 1 teaspoon fresh ginger, grated

    • 1 teaspoon curry powder or mild curry paste

    • 1 can (13.5 oz) coconut milk

    • 1 tablespoon soy sauce or tamari

    • 1 tablespoon lime juice

    • Salt and black pepper to taste

    • 2 cups cooked jasmine or basmati rice

    • Optional toppings: chopped cilantro, green onions, shredded carrots, bell peppers, sesame seeds

    These ingredients combine to create a creamy, aromatic sauce that coats every piece of chicken beautifully.

    Ingredient Notes

    Chicken

    Chicken breast keeps this recipe light and protein-rich, but chicken thighs work wonderfully if you want extra juiciness and flavor. Be sure to cut the pieces evenly so they cook at the same speed.

    Coconut Milk

    Full-fat coconut milk makes the sauce extra creamy, while light coconut milk creates a leaner version. Shake the can well before opening for the smoothest consistency.

    Rice

    Jasmine rice brings subtle fragrance, while basmati rice adds a fluffy texture. Brown rice or quinoa can also be used for a whole-grain option.

    Flavor Builders

    Garlic, ginger, and curry powder give the coconut chicken rice bowl its warm, layered flavor without overpowering the dish.


    Step-by-Step Instructions

    1. Heat olive oil in a large skillet over medium heat.

    2. Add diced chicken and cook for 5–6 minutes until lightly golden.

    3. Stir in garlic, ginger, and curry powder, cooking for 1 minute until fragrant.

    4. Pour in coconut milk, soy sauce, and lime juice.

    5. Simmer gently for 8–10 minutes until the sauce thickens and the chicken is fully cooked.

    6. Taste and adjust seasoning with salt and pepper.

    7. Spoon the coconut chicken over warm rice and add your favorite toppings.

    This simple method delivers rich flavor in one pan with minimal cleanup.

    Tips for Perfect Results

    • Cut chicken into similar-sized pieces for even cooking.

    • Simmer gently instead of boiling to keep the coconut sauce smooth.

    • Add vegetables like broccoli or snap peas directly into the skillet for a one-pan meal.

    • Finish with fresh lime juice for brightness.

    • Garnish with herbs for color and freshness.

    These small tips elevate your coconut chicken rice bowl from simple to spectacular.


    Variations

    One of the best things about this recipe is how adaptable it is:

    • Spicy Coconut Chicken Bowl: Add chili flakes or sriracha.

    • Vegetarian Version: Use tofu or chickpeas instead of chicken.

    • Low-Carb Option: Serve over cauliflower rice.

    • Tropical Twist: Add pineapple or mango chunks.

    • Thai-Inspired: Add fish sauce and fresh basil.

    Each version keeps the heart of the coconut chicken rice bowl while offering a new flavor direction.


    What to Serve With It

    This dish pairs well with:

    • A fresh cucumber or tomato salad

    • Roasted vegetables

    • Steamed green beans

    • Warm naan or flatbread

    • Sparkling lime water or iced tea

    These sides balance the creamy sauce and complete the meal.

    Storage & Reheating

    • Store leftovers in airtight containers in the refrigerator for up to 4 days.

    • Reheat gently in the microwave or on the stovetop with a splash of coconut milk or water.

    • Freeze the chicken and sauce (without fresh toppings) for up to 2 months.

    • Add herbs and lime juice after reheating for best flavor.

    This makes the coconut chicken rice bowl perfect for meal prep and busy weeks.


    Common Mistakes

    • Overcooking the chicken until dry

    • Letting the sauce boil too hard and separate

    • Skipping seasoning adjustments

    • Forgetting to add acid like lime juice

    • Using watery coconut milk without simmering long enough

    Avoiding these mistakes ensures a rich, smooth, and flavorful result.


    FAQs

    Q1: Can I make coconut chicken rice bowl ahead of time?
    Yes, the chicken and sauce can be made in advance and reheated when ready to serve.

    Q2: Is this recipe dairy-free?
    Yes, coconut milk replaces cream, making it naturally dairy-free.

    Q3: What vegetables work best in this bowl?
    Bell peppers, broccoli, snap peas, and spinach all work beautifully.

    Q4: Can I use rotisserie chicken?
    Absolutely. Add cooked chicken to the sauce and simmer just until warmed through.


    Final Thoughts

    The Coconut Chicken Rice Bowl is proof that quick meals can still feel exciting and nourishing. With tender chicken, creamy coconut sauce, and endless topping possibilities, this recipe brings comfort and freshness together in one beautiful bowl.

    Whether you’re cooking for your family, meal prepping for the week, or simply treating yourself to a flavorful dinner, this coconut chicken rice bowl delivers every time. Once you make it, it’s sure to become a regular favorite in your kitchen.

  • Creamy Coconut Chicken Bowls: Easy 20-Min Dinner

    Creamy Coconut Chicken Bowls: Easy 20-Min Dinner

    When weeknights get busy, you need a meal that’s fast, comforting, and full of flavor—and that’s exactly what Creamy Coconut Chicken Bowls: Easy 20-Min Dinner delivers. This recipe brings together tender chicken simmered in a silky coconut milk sauce with warm spices and fresh vegetables, all served over fluffy rice or grains. It’s the kind of dish that feels indulgent but is still wholesome and balanced.

    These creamy coconut chicken bowls are inspired by tropical flavors and modern American meal-bowl trends. They’re perfect for families, meal preppers, and anyone who wants a satisfying dinner without spending hours in the kitchen. In just 20 minutes, you’ll have a restaurant-style bowl that tastes rich, cozy, and vibrant.

    Why You’ll Love This Recipe

    This recipe checks all the boxes: fast, flavorful, and flexible. The creamy coconut sauce coats the chicken beautifully, while the bowl format lets you customize each serving with your favorite toppings. It’s also naturally dairy-free and can easily be made gluten-free.

    You’ll love these creamy coconut chicken bowls because:

    • They’re ready in about 20 minutes

    • They use simple pantry ingredients

    • They’re great for meal prep

    • They’re rich and creamy without heavy cream

    • They’re family-friendly and customizable

    This is one of those recipes you’ll come back to again and again when you want comfort food with a healthy twist.


    Ingredients

    To make creamy coconut chicken bowls, you’ll need:

    • 1 pound boneless, skinless chicken breast (cut into bite-size pieces)

    • 1 tablespoon olive oil

    • 2 cloves garlic, minced

    • 1 teaspoon fresh ginger, grated

    • 1 teaspoon curry powder or curry paste

    • 1 can (13.5 oz) coconut milk

    • 1 tablespoon soy sauce or tamari

    • 1 tablespoon lime juice

    • Salt and black pepper to taste

    • 2 cups cooked jasmine or basmati rice

    • Optional toppings: cilantro, green onions, shredded carrots, red bell peppers, sesame seeds

    These ingredients come together to create a creamy, savory, slightly sweet sauce that pairs perfectly with rice and vegetables.

    Ingredient Notes

    Chicken

    Chicken breast cooks quickly and absorbs the coconut sauce well. You can also use chicken thighs for a juicier and slightly richer flavor.

    Coconut Milk

    Full-fat coconut milk creates the creamiest sauce, but light coconut milk works if you want a lighter version. Shake the can before opening for best consistency.

    Garlic and Ginger

    These two ingredients build the flavor base and add warmth and depth to the sauce.

    Curry Seasoning

    Curry powder adds gentle spice and color. You can adjust the amount depending on how bold you want the flavor.


    Step-by-Step Instructions

    1. Heat olive oil in a large skillet over medium heat.

    2. Add chicken pieces and cook for 5–6 minutes until lightly golden.

    3. Stir in garlic, ginger, and curry powder, cooking for 1 minute until fragrant.

    4. Pour in coconut milk, soy sauce, and lime juice.

    5. Simmer for 8–10 minutes until the sauce thickens and the chicken is cooked through.

    6. Taste and season with salt and pepper.

    7. Spoon the creamy coconut chicken over warm rice and add your favorite toppings.

    This method creates tender chicken and a rich sauce in just one pan.

    Tips for Perfect Results

    • Cut chicken into even pieces for quick, even cooking.

    • Don’t boil the sauce aggressively—gentle simmering keeps it creamy.

    • Add vegetables like bell peppers or snap peas directly to the pan for a one-skillet meal.

    • Finish with fresh lime juice for brightness.

    • Garnish with herbs for color and freshness.

    These tips help your creamy coconut chicken bowls turn out flavorful and visually appealing every time.


    Variations

    This recipe is easy to customize based on taste and diet:

    • Spicy Version: Add red pepper flakes or sriracha.

    • Vegetarian Option: Replace chicken with tofu or chickpeas.

    • Low-Carb Bowl: Serve over cauliflower rice instead of regular rice.

    • Tropical Twist: Add pineapple or mango chunks for sweetness.

    • Thai-Inspired: Add a splash of fish sauce and fresh basil.

    Each variation keeps the core of the creamy coconut chicken bowls while offering new flavor profiles.


    What to Serve With It

    These bowls pair beautifully with:

    • Steamed jasmine or basmati rice

    • Quinoa or brown rice

    • Simple cucumber salad

    • Roasted broccoli or green beans

    • Warm naan or flatbread

    Serving them with fresh sides balances the richness of the coconut sauce.

    Storage & Reheating

    • Store leftovers in airtight containers in the refrigerator for up to 4 days.

    • Reheat gently in a skillet or microwave with a splash of coconut milk or water.

    • Freeze the chicken and sauce for up to 2 months (without fresh toppings).

    • Add fresh herbs and lime juice after reheating for best flavor.

    This makes creamy coconut chicken bowls perfect for meal prep and busy weeks.


    Common Mistakes

    • Overcooking the chicken, making it dry

    • Letting the sauce boil too hard and separate

    • Skipping seasoning adjustments

    • Forgetting acid like lime juice

    • Using very thin coconut milk without thickening time

    Avoiding these mistakes ensures a smooth, rich sauce and tender chicken.


    FAQs

    Q1: Can I make creamy coconut chicken bowls ahead of time?
    Yes, the chicken and sauce can be made in advance and reheated when ready to serve.

    Q2: Is this recipe dairy-free?
    Yes, it uses coconut milk instead of cream, making it naturally dairy-free.

    Q3: What vegetables work best in this recipe?
    Bell peppers, broccoli, snap peas, and spinach all work well.

    Q4: Can I use rotisserie chicken?
    Absolutely. Add cooked chicken to the sauce and simmer just until warmed through.


    Final Thoughts

    Creamy Coconut Chicken Bowls: Easy 20-Min Dinner proves that quick meals can still feel special and comforting. With tender chicken, a rich coconut sauce, and endless topping options, this dish brings bold flavor to your table in very little time.

    Whether you’re cooking for your family or prepping lunches for the week, these creamy coconut chicken bowls are a reliable, delicious choice. Once you try them, they’re sure to become a regular part of your dinner rotation.

  • Honey Lime Chicken & Avocado Rice Stack

    Honey Lime Chicken & Avocado Rice Stack

    If you love bold flavors and beautiful presentation, this Honey Lime Chicken & Avocado Rice Stack is about to become your new favorite meal. It combines juicy honey-lime glazed chicken with fluffy rice and creamy avocado in a layered stack that looks restaurant-worthy but is surprisingly easy to make at home. Sweet, tangy, and savory notes come together in one balanced dish that works for lunch, dinner, or meal prep.

    This recipe is inspired by fresh, modern American cooking—simple ingredients, bright flavors, and clean presentation. Whether you’re cooking for your family or impressing guests, this dish delivers both nutrition and visual appeal.

    Why You’ll Love This Recipe

    This honey lime chicken & avocado rice stack is more than just pretty—it’s incredibly practical. It’s high in protein, full of fresh ingredients, and easy to customize. You can prep each component ahead of time and assemble when ready to serve, making it ideal for busy schedules.

    You’ll love this recipe because:

    • It’s sweet, tangy, and savory all in one bite

    • It’s great for meal prep and leftovers

    • It’s naturally gluten-free

    • It looks impressive with minimal effort

    • It’s family-friendly and customizable

    It’s the perfect balance of comfort food and healthy eating.


    Ingredients

    To make this honey lime chicken & avocado rice stack, you’ll need:

    • 2 boneless, skinless chicken breasts

    • 3 tablespoons honey

    • Zest and juice of 2 limes

    • 2 tablespoons olive oil

    • 2 cloves garlic, minced

    • Salt and black pepper to taste

    • 2 cups cooked white or brown rice

    • 2 ripe avocados, diced

    • 2 tablespoons chopped cilantro

    • Optional: chili flakes, green onions, sesame seeds

    These simple ingredients come together to create a dish that tastes bright, fresh, and satisfying.

    Ingredient Notes

    Chicken

    Boneless chicken breasts work best because they cook quickly and soak up the honey lime marinade beautifully. You can also use chicken thighs for a juicier result.

    Honey & Lime

    The honey provides sweetness while lime juice and zest add acidity and brightness. Together, they create a glaze that caramelizes slightly when cooked.

    Rice

    White rice offers a neutral base, while brown rice adds fiber and nuttiness. Jasmine or basmati rice also works well for extra fragrance.

    Avocado

    Avocado adds creaminess and healthy fats that balance the tangy chicken. Use ripe but firm avocados for clean layers.


    Step-by-Step Instructions

    1. In a bowl, whisk honey, lime juice, lime zest, olive oil, garlic, salt, and pepper.

    2. Marinate the chicken for at least 20 minutes (or up to 8 hours in the fridge).

    3. Heat a skillet over medium heat and cook chicken for 5–6 minutes per side until golden and cooked through.

    4. Remove chicken and let rest, then slice or cube it.

    5. Stir chopped cilantro into the cooked rice.

    6. To assemble, layer rice at the bottom, avocado in the middle, and honey lime chicken on top using a food ring or bowl mold.

    7. Drizzle extra glaze from the pan over the stack before serving.

    This method ensures every bite has balanced flavor and texture.

    Tips for Perfect Results

    • Don’t overcook the chicken or it will dry out.

    • Let the chicken rest before slicing to keep it juicy.

    • Add lime zest at the end for extra aroma.

    • Use freshly cooked rice for the best texture.

    • Assemble stacks just before serving for clean layers.

    These tips make your honey lime chicken & avocado rice stack look and taste professional.


    Variations

    This recipe is very flexible and easy to customize:

    • Spicy Version: Add sriracha or chili flakes to the honey lime glaze.

    • Tropical Twist: Add mango or pineapple between the rice and avocado layers.

    • Vegetarian Option: Replace chicken with grilled tofu or chickpeas.

    • Low-Carb Version: Use cauliflower rice instead of regular rice.

    • Tex-Mex Style: Add black beans and corn with avocado.

    Each variation keeps the spirit of the honey lime chicken & avocado rice stack while offering new flavors.


    What to Serve With It

    This dish pairs well with:

    • A simple cucumber or tomato salad

    • Grilled vegetables

    • Tortilla chips and salsa

    • Sparkling lime water or iced tea

    • Roasted sweet potatoes

    These sides complement the sweet and tangy flavors beautifully.

    Storage & Reheating

    • Store components separately in airtight containers for up to 3–4 days in the refrigerator.

    • Reheat chicken and rice gently in the microwave or skillet.

    • Add fresh avocado only when serving to prevent browning.

    • Do not freeze avocado, but chicken and rice freeze well for up to 2 months.

    This makes the recipe ideal for meal prep and weekday lunches.


    Common Mistakes

    • Skipping the marinade time

    • Overheating honey, causing it to burn

    • Using underripe avocados

    • Adding avocado too early and letting it brown

    • Overloading the stack so it collapses

    Avoiding these mistakes ensures your honey lime chicken & avocado rice stack looks beautiful and tastes fresh.


    FAQs

    Q1: Can I make honey lime chicken & avocado rice stack ahead of time?
    Yes, prepare the chicken and rice in advance and assemble with fresh avocado just before serving.

    Q2: What rice works best for this recipe?
    White, brown, jasmine, or basmati rice all work well depending on your preference.

    Q3: Is this recipe healthy?
    Yes, it’s high in protein, includes healthy fats from avocado, and uses natural sweeteners like honey.

    Q4: Can I grill the chicken instead of pan-frying?
    Absolutely. Grilled honey lime chicken adds smoky flavor and works perfectly in this stack.


    Final Thoughts

    The Honey Lime Chicken & Avocado Rice Stack is proof that healthy food can be exciting, flavorful, and visually stunning. With its sweet citrus glaze, creamy avocado, and fluffy rice base, it delivers comfort and freshness in every bite.

    Whether you’re preparing a weeknight dinner, meal prepping for the week, or serving guests, this recipe is a guaranteed crowd-pleaser. Try it once, and it will quickly become a go-to favorite in your kitchen rotation.