When cravings hit and you want something warm, cheesy, and packed with flavor, Air Fryer Cheesy Tortilla Garlic Bread is the answer. This quick and easy recipe transforms simple tortillas into crispy, golden garlic bread with gooey melted cheese in just minutes. It’s the perfect solution for busy weeknights, late-night snacks, or a fast appetizer when guests show up unexpectedly.
What makes this recipe so special is its simplicity. Instead of traditional bread, tortillas create a thin, crunchy base that cooks beautifully in the air fryer. The garlic butter soaks in quickly, while the cheese melts evenly for that irresistible pull-apart texture. Once you try this Air Fryer Cheesy Tortilla Garlic Bread, you’ll want to make it again and again.

Why You’ll Love This Recipe
This Air Fryer Cheesy Tortilla Garlic Bread recipe is a game-changer for anyone who loves fast comfort food. It’s budget-friendly, customizable, and incredibly satisfying without requiring a full oven bake.
You’ll love it because:
-
It’s ready in under 10 minutes
-
Uses pantry staples
-
Perfectly crispy edges with melty cheese
-
Great for kids and adults
-
Works as a snack, side dish, or appetizer
Whether you’re pairing it with soup or serving it as a party bite, this recipe fits almost any occasion.
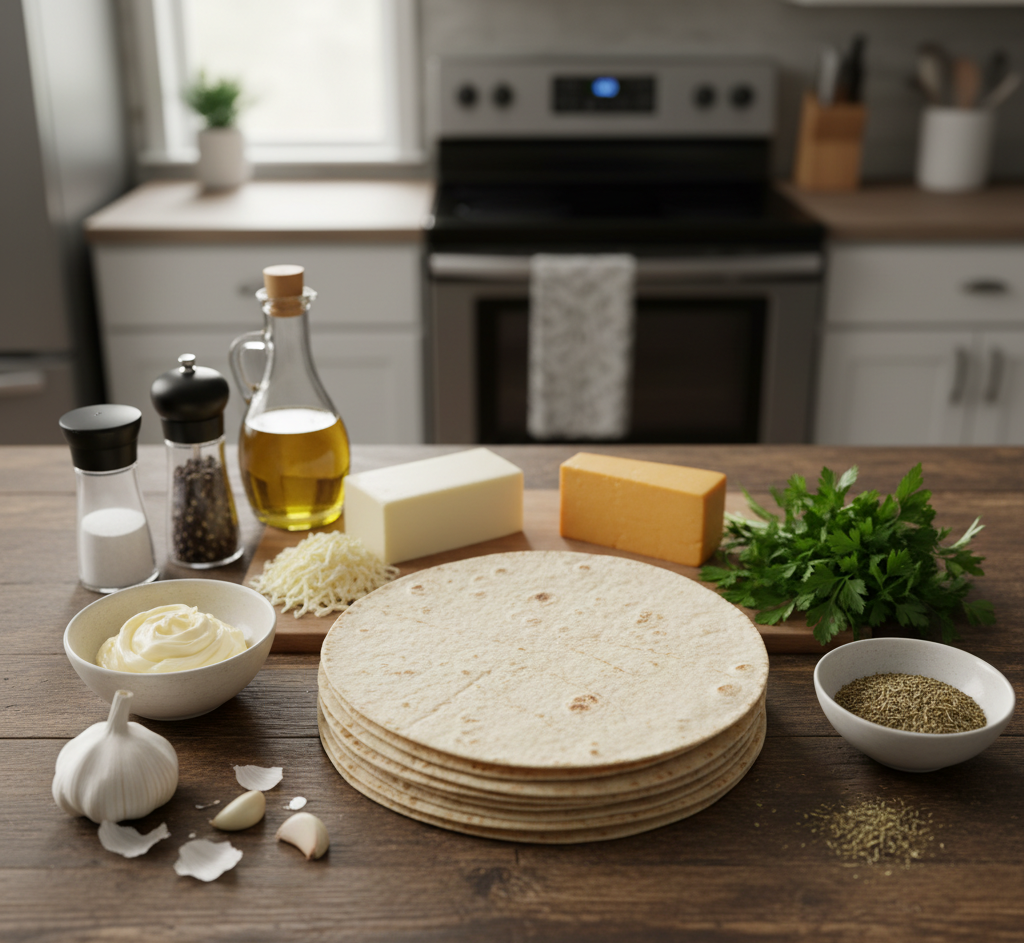
Ingredients
To make Air Fryer Cheesy Tortilla Garlic Bread, you’ll need:
-
Flour tortillas
-
Unsalted butter, softened
-
Fresh garlic, minced (or garlic powder)
-
Shredded mozzarella cheese
-
Grated Parmesan cheese
-
Italian seasoning or dried oregano
-
Salt and black pepper
-
Fresh parsley (optional garnish)
Ingredient Notes
Flour tortillas work best because they crisp evenly while staying sturdy enough to hold the toppings. Mozzarella provides that classic cheese pull, while Parmesan adds a sharp, salty finish. Fresh garlic brings bold flavor, but garlic powder is a great substitute if you’re short on time.
Italian seasoning adds a familiar garlic bread aroma, while fresh parsley gives a pop of color and freshness. Using softened butter makes spreading quick and easy, ensuring every bite gets coated in garlic flavor.
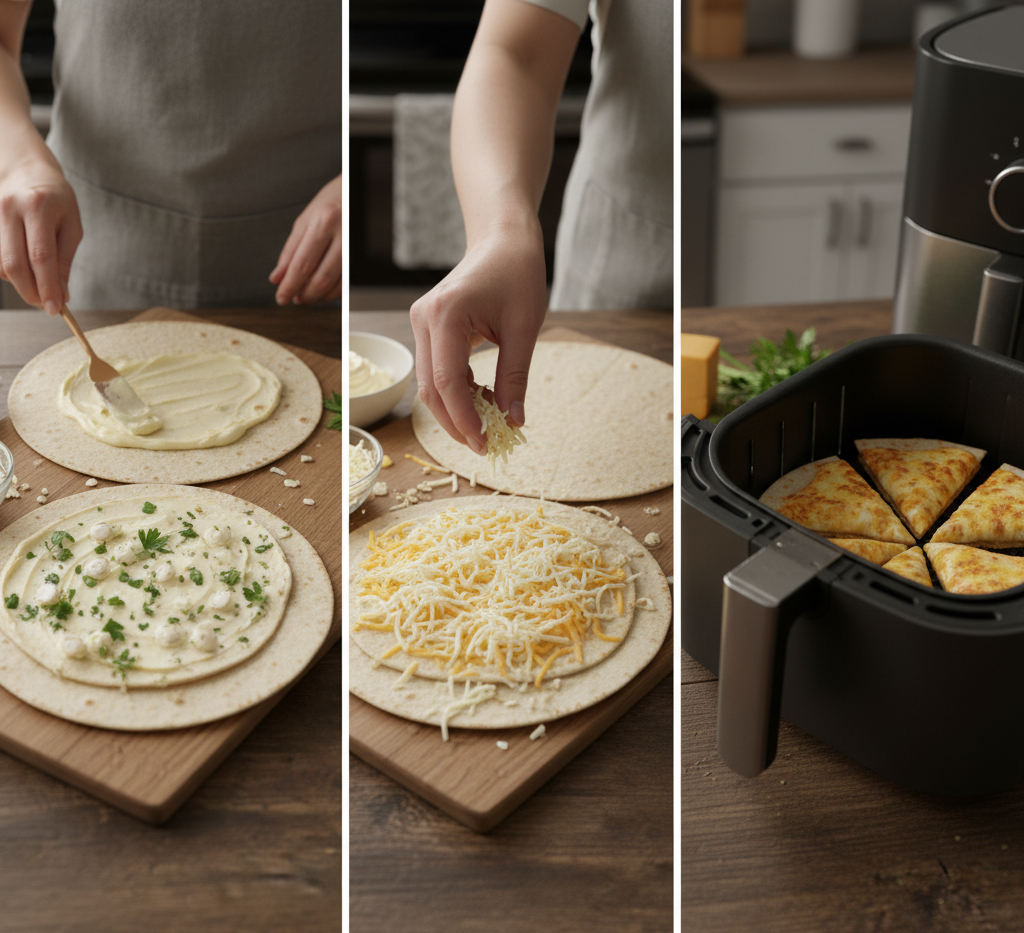
Step-by-Step Instructions
How to Make Air Fryer Cheesy Tortilla Garlic Bread
-
Preheat your air fryer to 375°F.
-
Mix softened butter with minced garlic, salt, pepper, and Italian seasoning.
-
Spread the garlic butter evenly over each tortilla.
-
Sprinkle mozzarella and Parmesan cheese on top.
-
Place tortillas in the air fryer basket in a single layer.
-
Air fry for 5–7 minutes until golden and bubbly.
-
Remove carefully and slice into wedges.
-
Garnish with fresh parsley before serving.
Tips for Perfect Results
For the crispiest Air Fryer Cheesy Tortilla Garlic Bread, avoid overcrowding the air fryer basket. Cook in batches if needed to allow proper airflow. Keep an eye on the tortillas during the last minute of cooking because thin tortillas can brown quickly.
Helpful tips include:
-
Use parchment liner with holes for easy cleanup
-
Preheat the air fryer for even cooking
-
Slice after cooking to avoid losing cheese
-
Add extra cheese around edges for crispy bits
Variations
This recipe is easy to customize based on your taste preferences:
-
Spicy version: add crushed red pepper flakes or jalapeños
-
Mexican-style: use cheddar and taco seasoning
-
Herb lover’s: add basil, thyme, or rosemary
-
Protein boost: top with cooked chicken or turkey bacon
-
Vegan: use dairy-free butter and cheese

-
-